How to Do a Perfect Cut Crease Eye Makeup — Step by Step for Beginners
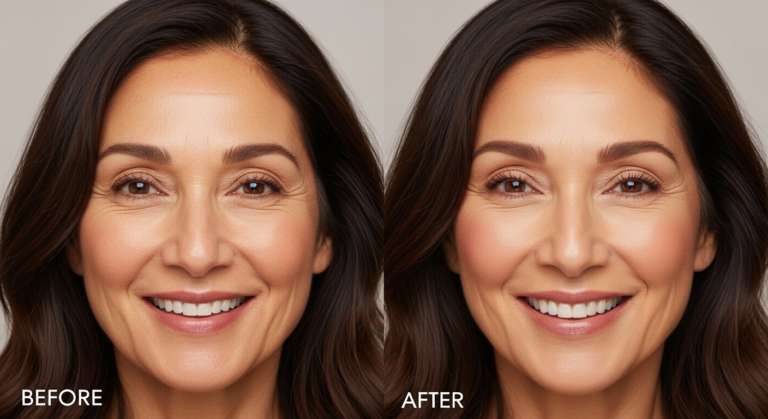
=If you’ve ever tried cut crease eye makeup and ended up with uneven lines, patchy shadow, or a crease that just won’t pop… you are definitely not alone. This look is stunning, but it can feel intimidating when you don’t know the exact steps.
The truth? Cut crease eye makeup isn’t as hard as it looks — you just need the right technique (and a little patience). Once you get the hang of it, your eye makeup will instantly look sharper, more lifted, and seriously professional.
So grab your brushes, because I’m walking you through this step by step like your beauty bestie.
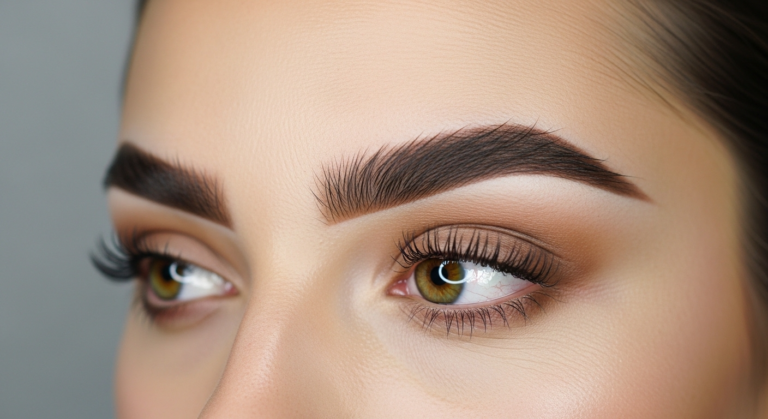
What Is Cut Crease Eye Makeup (And Why It Looks So Good)
Cut crease eye makeup is all about defining your crease with precision and contrast.
You’re basically “cutting” your crease using concealer to create a clean separation between your lid and crease color. This makes your eyes look bigger, more defined, and super polished.
It’s perfect for:
- Hooded eyes
- Small eyes
- Glam makeup looks
- Special events or nights out
What You’ll Need (Beginner-Friendly Kit)
Before we start, make sure you have these essentials ready:
- Eyeshadow palette (neutral tones + one shimmer)
- Flat concealer brush
- Fluffy blending brush
- Small detail brush
- Full-coverage concealer
- Eyeliner (optional)
- Mascara or lashes
You don’t need expensive products — technique matters way more here.
Step 1: Prep Your Eyelids Properly
Start with clean, dry eyelids. Apply a small amount of concealer or an eyeshadow primer.
Blend it out and lightly set it with powder or a neutral shadow. This creates a smooth base so your cut crease eye makeup doesn’t crease or fade.
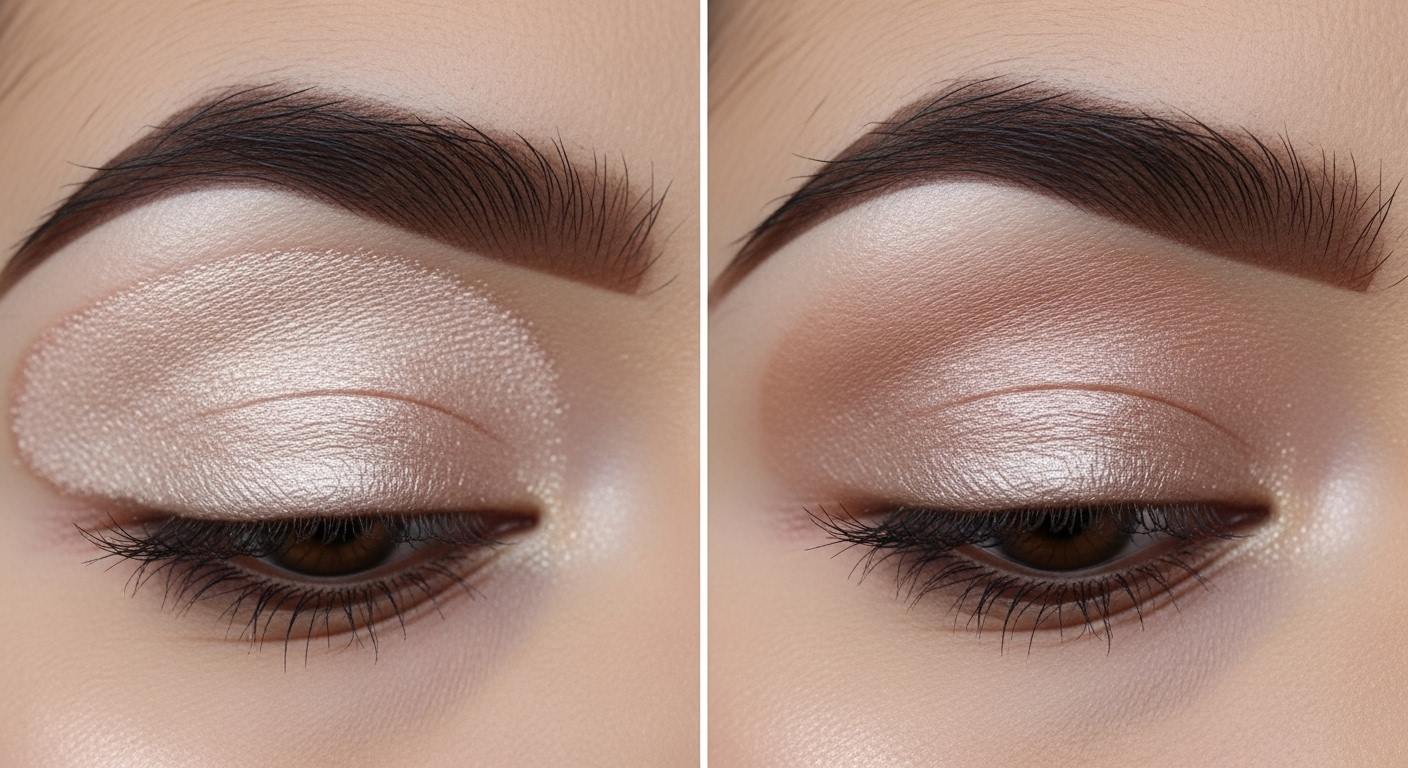
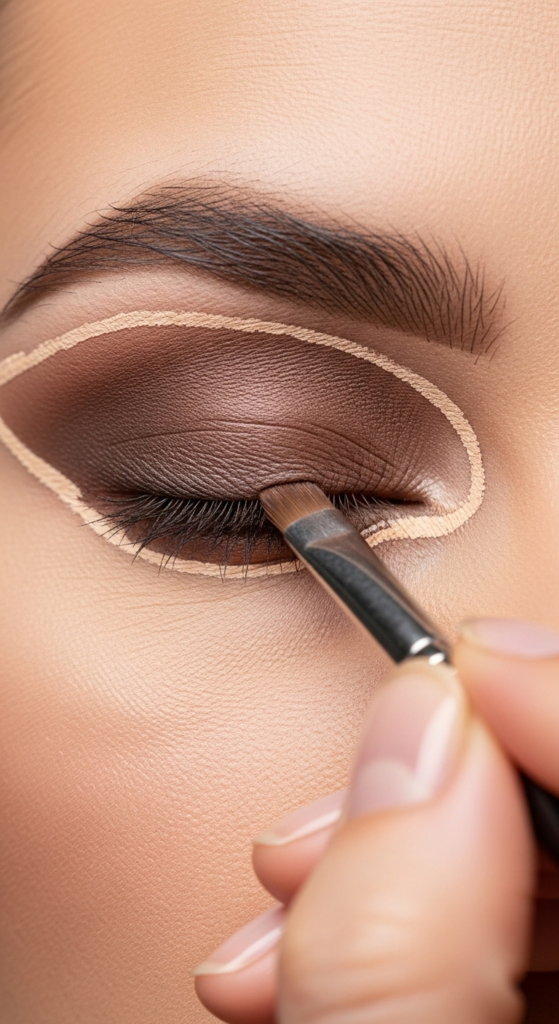
Step 2: Map Out Your Crease

Take a medium-toned matte shade (like soft brown) and a fluffy brush.
Gently blend it slightly above your natural crease. This helps your eyes look more lifted and gives you a guide for where your cut crease will go.
Step 3: Deepen the Outer Corner
Now grab a darker shade and focus it on the outer corner of your eye.
Blend it inward slightly, keeping most of the color on the outer third. This adds depth and creates that dramatic effect cut crease eye makeup is known for.
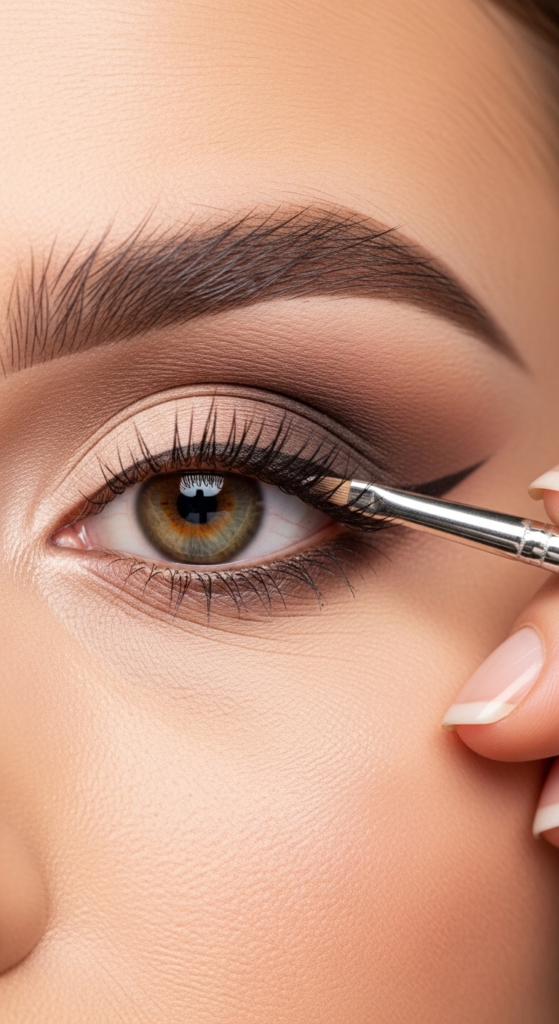
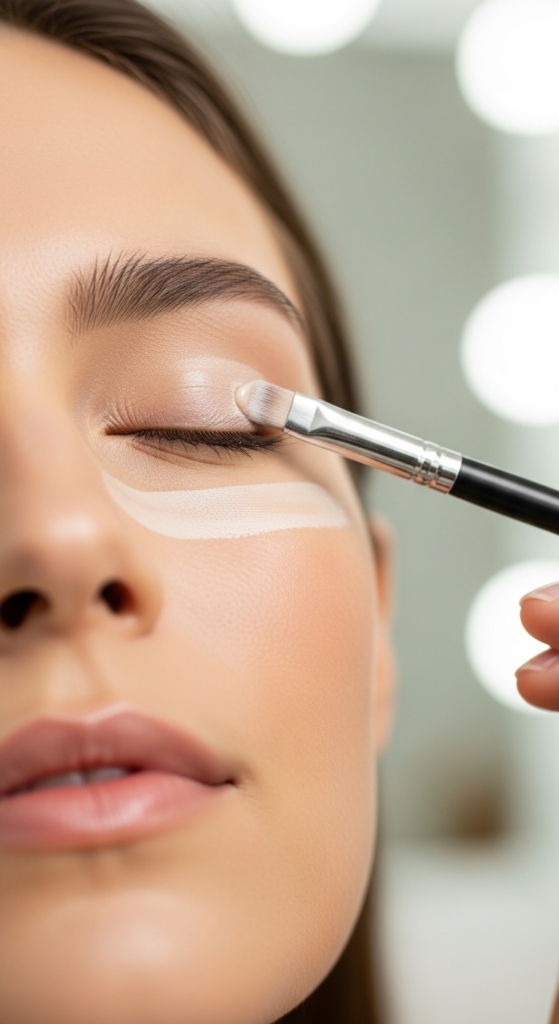
Step 4: Cut the Crease (The Key Step)
Here’s where the magic happens.
Take your concealer and a flat brush, then carefully carve out your lid space:
- Look straight into the mirror
- Apply concealer slightly above your natural crease
- Follow your eye shape to create a clean line
Pro tip: Open your eyes while the concealer is still wet — it will naturally stamp where your crease should go.
Step 5: Set the Cut with a Light Shade
Before the concealer creases, pack a light matte or shimmer shade on top.
This locks everything in place and gives your lid that bright, clean look. Press the shadow instead of swiping for the best results.
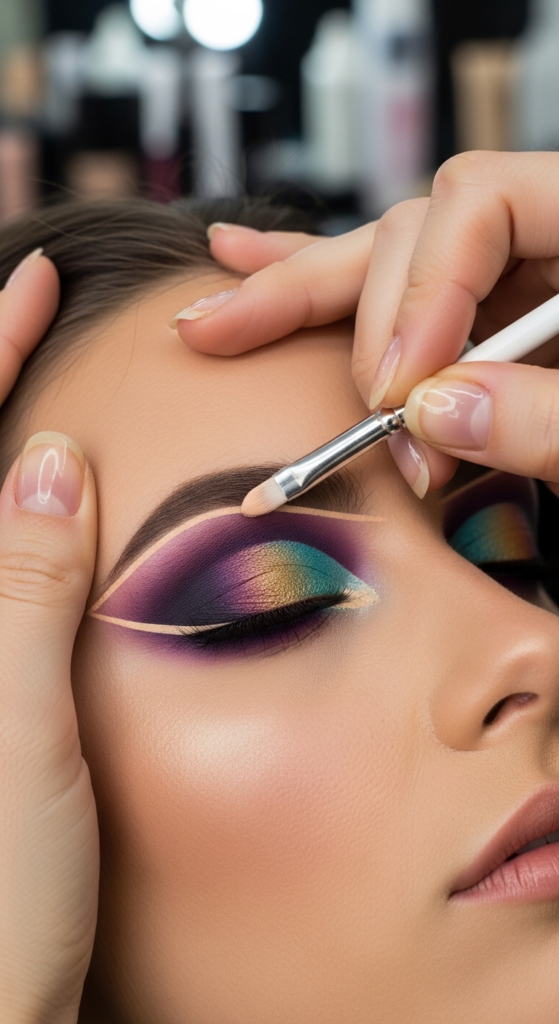
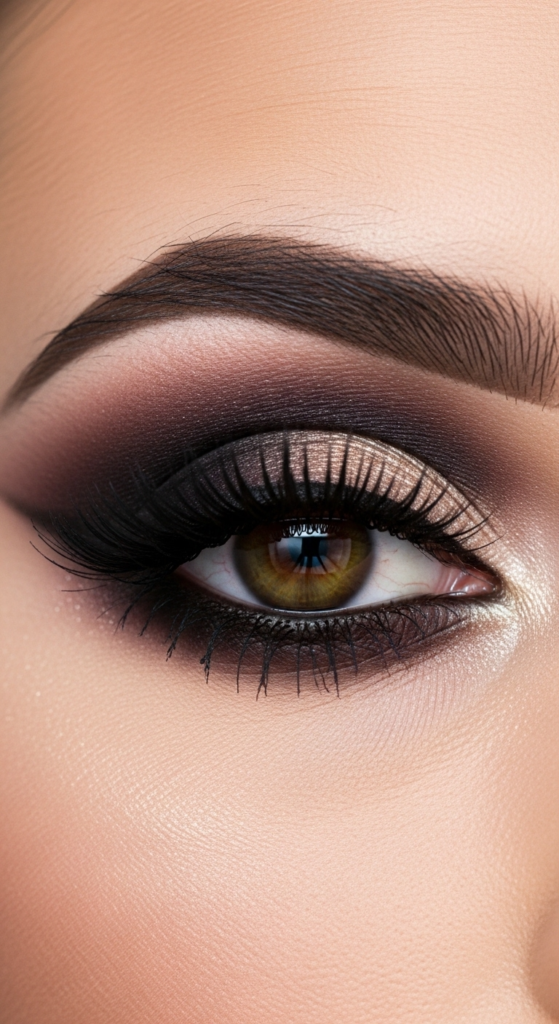
Step 6: Blend the Edges (Don’t Skip This!)
You don’t want a harsh line between your cut crease and crease color.
Take a small blending brush and gently soften the edges where the colors meet. This step makes your eye makeup look seamless instead of blocky.
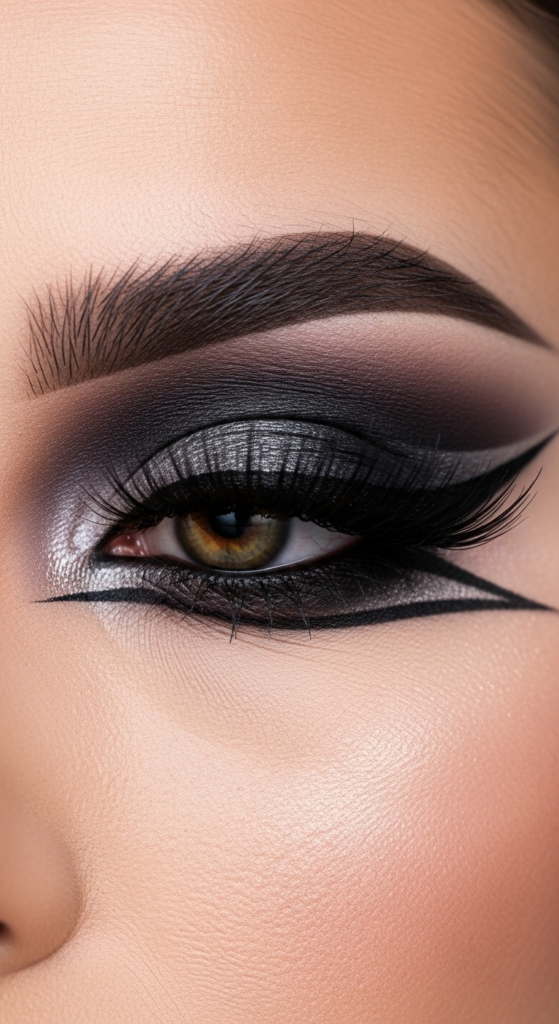
Step 7: Add Shimmer or Glitter (Optional but Stunning)
If you want that glam look, add shimmer to the center of your lid.
Use your finger or a flat brush to apply it right on top of your cut crease. This catches the light and makes your eyes pop instantly.
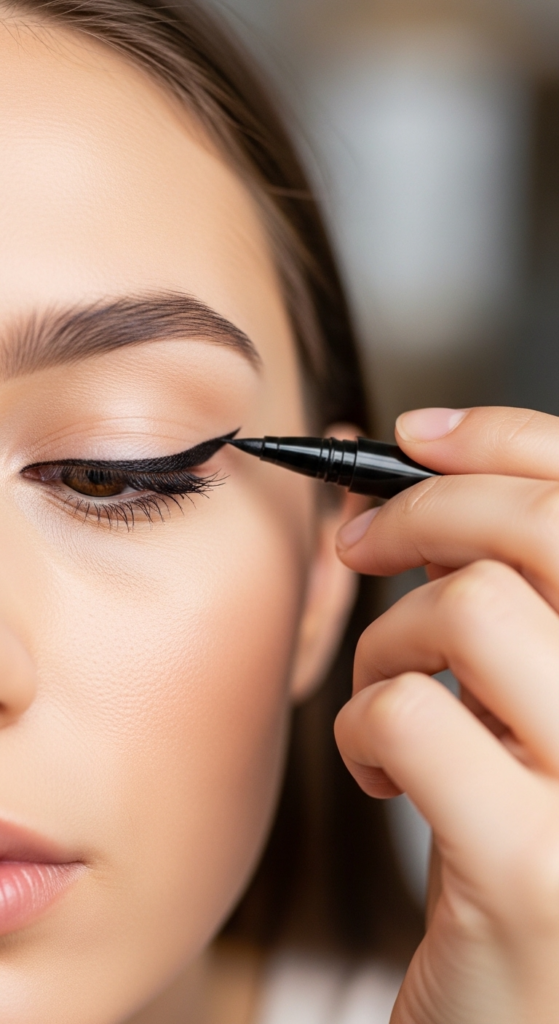
Step 8: Define with Eyeliner
Eyeliner takes your cut crease eye makeup to the next level.
Keep it thin along the lash line so it doesn’t hide your hard work. A small wing can add extra drama if you love that look.
Step 9: Finish with Mascara or Lashes
No cut crease is complete without lashes.
- Use mascara for a natural finish
- Add false lashes for full glam
This step pulls everything together and makes your eyes stand out even more.